Tuesday, January 28, 2014

Gravity-Fed Drip Irrigation

In response to the most severe drought in 40 years, The California State Water Project just shut off its spigots to dozens of communities and farmers, in order to maintain the little water to use "as wisely as possible".

What could be wiser than reducing your dependence on California to produce cheap organic food, given their reliance on top-down irrigation projects that are susceptible to collapse as their snowpacks begin to fail?

What could be wiser than utilizing the water that already runs off your home or garage to water your garden, and avoid paying hundreds of dollars a summer to water mitigation company for a public resource?

At Freedom Gardens at the Fairgrounds, we hope to educate the public about ways in which they can reduce their dependence on a susceptible food-system. We hope to free ourselves from the need to use public water systems to water our gardens, by capturing rainwater. We will free ourselves from the need to use fossil fuels to pump water, by employing small solar powered pumps to fill tanks for a gravity-fed drip irrigation system for our gardens.  We hope to further reduce water use by employing cultural practices that encourage healthy deep root systems, and utilizing soils high in water-holding organic matter.

We need to move forward on rainwater harvesting, but last summer we solved one part of the equation: we built a gravity-fed drip irrigation system to water our gardens.

Our garden is located at the Missoula County Fairgrounds, next to two large horse barns on the far south end of the property.  Between the 1920's and 1941, the area served as the Missoula Airport.  The water pipes serving this part of the property are original wood pipes, and are so leaky that the Fair can only afford to turn them on twice per year.  As such, we did not have a reliable water source at our garden.  The success of any agricultural project relies on water.

We designed a gravity-fed drip irrigation system.

The fairgrounds uses a 3000 gallons water truck to keep the dust down.  The Fair Caretaker, Glen, agreed to use this truck to fill our reservoirs if we made it convenient for him.

We were able to procure a load of industrial bulk containers, or IBCs for short.  Each IBC holds approximately 280 gallons - a string of 8 would allow us to get >2000 gallons of water in only one trip.  When considering a water reservoir consider your chosen container's previous use.  Our IBCs previously housed a soy-based glue, which we were able to wash out with a pressure washer easily.


The beginnings of the bulk head extension. 
With all our supplies, we were ready to begin piecing the irrigation puzzle together.The first piece of the puzzle was to link all of the IBCs together  using a header that all tanks could be filled and drained as one unit rather than eight individual units.  Our first attempt included attaching the bottom four IBCs in parallel, then branching upwards into the tanks above with 2 inch PVC.  We quickly realized that the air inside the tanks needed to go somewhere prior to being replaced with water.  The solution became apparent as soon as the problem - we needed to add bulkheads to each tank.

Bulkheads allow us to add a second hole to each IBC, which in turn allows an exit for air as water fills the void.  The key to remember here is that the air will eventually be replaced by water as the bottom tanks fill and the top tanks begin taking on water.  To prevent water loss and to allow the top tanks to fill, we simply built the bulkhead exits higher than the maximum fill point on the tanks.  We could now move on to the next stage of problem solving - filling the tanks quickly and efficiently.
A fire hose connects the reservoir
the tanker truck
After inspecting the tanker truck, we purchased a simple fire hose would allow us to attach to both tanker truck and reservoir. Our first attempt was to connect to only one of the top IBCs in order to fill the reservoir, but we quickly noted that the tanker was able to pump water faster than the reservoir was able to receive it.  We solved this problem by creating a manifold that allows water to enter through each of the top tanks at once.  By spreading the tanker flow from one to four tanks at once, we were able to minimize the time necessary for a complete and efficient fill.  We were now ready to pursue the irrigation lines.

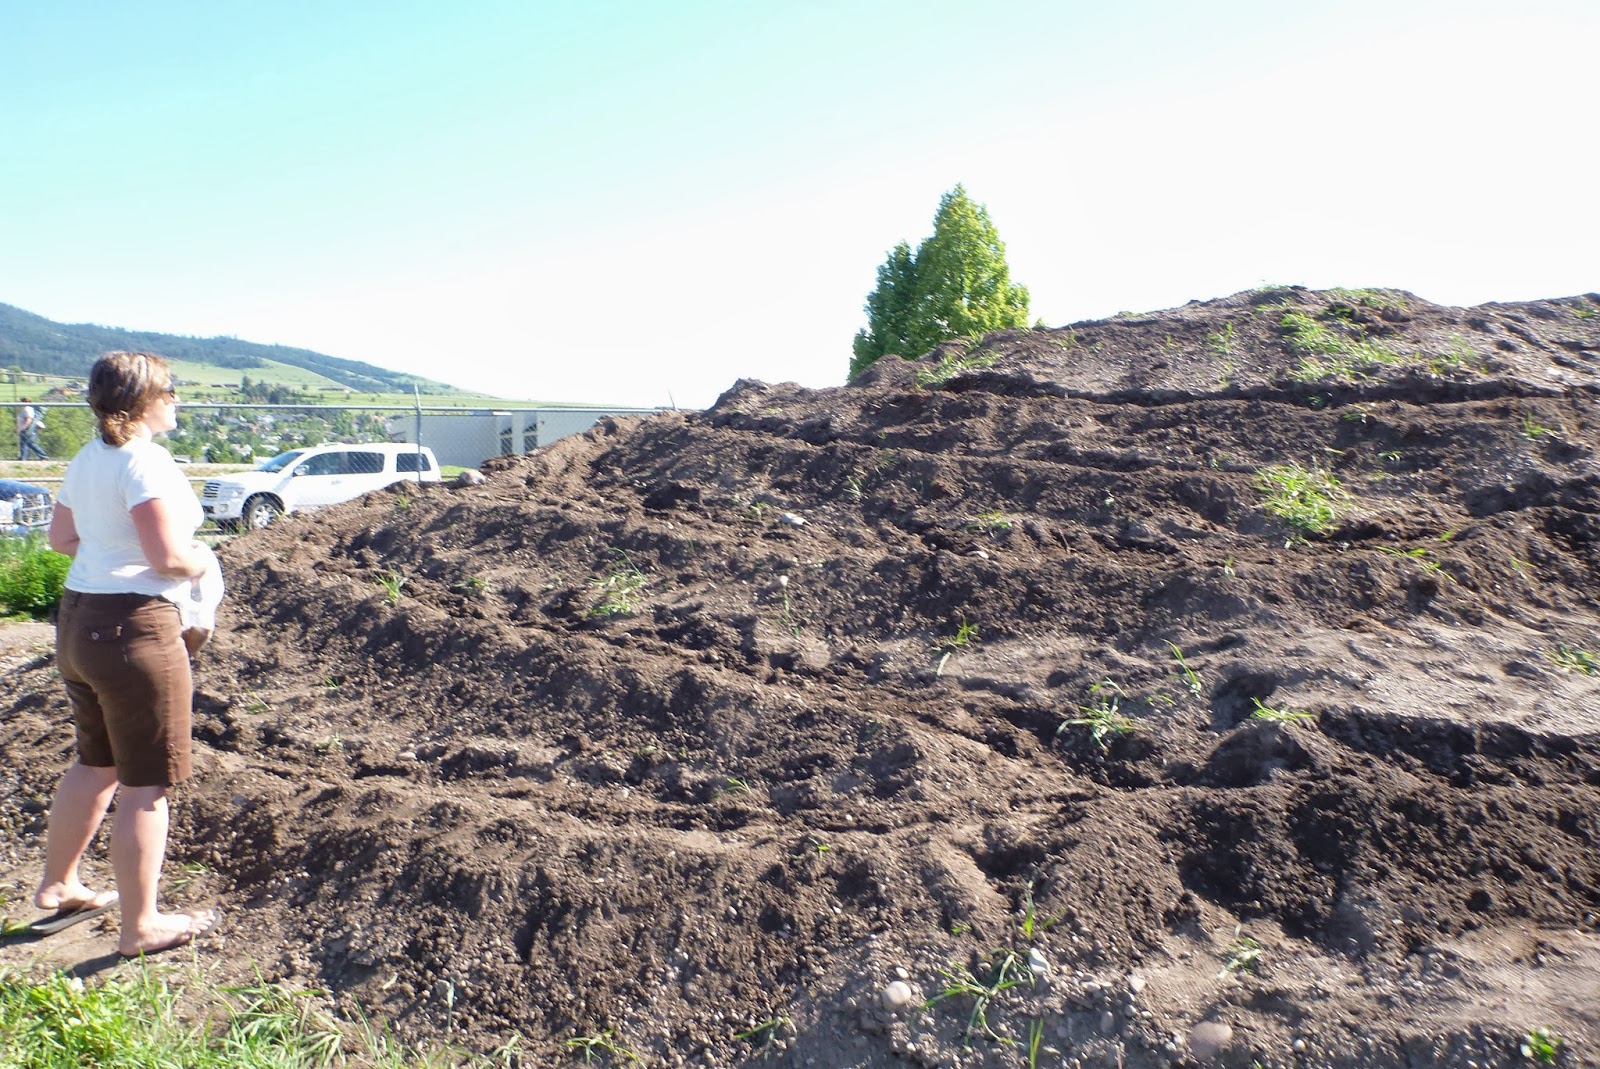
As we mentioned in previous blog entries, the fairgrounds staff conveniently created to large berms to the west of our plot.  The berm closest to our coldframes stands roughly 12 feet tall.  Given that pounds per square inch [psi] increases by .4 for each foot, we calculated that our lowest system psi was 12ft * .4 = 4.8 psi. Given that each IBC is roughly 4 feet tall, and we've stacked two on top of each other, we calculated our maximum system psi to be (12ft + 4ft + 4ft) * .4 = 8 psi.  Once our calculations were complete, we knew that we needed to identify an irrigation system capable of functioning within 4 and 8 psi.  A perusal of available irrigation components yielded the John Deere T-Tape series - perfect not only for its function at low flows, but also in consideration of cost, equal water distribution, and conservative water discharge.

Chris tacking up the irrigation supply line
With drip tape ordered and in the mail, we laid a main line of 3/4 inch polyethylene pipe from the irrigation reservoir to a manifold box where we diverted the main stream into three separate polyethylene lines, each containing its own shutoff valve leading to a row of coldframes.  If you look back at the coldframes blog entry, you'll note that we have three rows of coldframes with the middle row having two separate sets of boxes.  We trenched the irrigation main lines under and into the center back of both the front and back row of boxes.  In the middle section, we split the line in the area between the boxes and then ran a line into the side of each box.  Another note of wisdom here - tape the ends of your irrigation lines shut before moving them through the dirt.  This will keep dirt from entering and inevitably clogging your lines.

End caps in two different configurations
Once the irrigation lines were in the boxes, we used a tee to split the line once more (in the front and back rows) and ran an equal length of line from tee to each end of the box.  The idea here was to keep the lines as equal as possible so as to ensure equal irrigation distribution.  Our last step in laying the irrigation mains was to secure them to the back of the boxes and cap the ends. Interestingly enough, the hardware store had a limited supply of caps, so we needed to gather two separate configurations.

The last step to completing the irrigation system was to install the newly arrived John Deere T-Tape and of course, testing.  We were able to purchase the necessary connectors and termination components for the t-tape upon ordering, so all we really needed to do was pierce the irrigation main, insert the connector, slip on a length of t-tape, and place a terminator on the end.  It doesn't just sound easy, it really was!

With the irrigation system installed, we eagerly tried one line alone.  Upon seeing it successfully work, we curiously attempted to run two lines at one - success.  Could we run all three boxes at once?  You betcha!  Our irrigation system was complete and we were ready to get growing!

One of our nearly finished fifteen coldframes


Saturday, January 18, 2014

Cold Frame Extravaganza!

We began our Freedom Gardens pursuit with a goal-in-mind to extend Montana's growing season, which is May 1st to September 30th. One concept in particular drew our attention - Elliot Coleman's technique of covering produce inside a hoop-house for added protection, known as double covering. We hypothesized that a similar method of double covering could be achieved with the use of cold frames.
                                                                                                                                              
We knew we wanted a frame deeper than the one featured in the previous blog posted by Chris below, but were not quite satisfied by the dimensions set forth by Elliot Coleman - 8 to 12 inches high in the back, and 6 to 8 inches high in the front.  We decided to make our prototype dimensions
The prototype
21.5 inches high in the back and 9.5 inches in the front, with a distance of 4 feet between the front and back and 6 feet from side to side. When the cold frame was completed, we stepped back and critically analyzed.  We were still concerned about the height of the box - our thought was the taller the lid, the taller the plant could become.  We also figured we could gather another 6 square feet by adding a one foot ledge to the back of the box.  Our final adjustments led to a 12 inch front and a 24 inch back with a 5 foot depth and 6 foot width for 30 square feet of growing space per box.
When it comes to building, nothing substitutes a well thought-out drawing.  When we decided to build cold frames, every step was drawn out prior to action.  Fortunately, Mark E. possesses some impressive graphic skills, which turned our mere sketches into works of art!

Cold Frame Template - We followed these dimensions near exact with the exception of increasing the front and back box heights to 12 and 24 inches respectively.
The other rather important aspect of building, is calculating exactly how much materials you need to acquire in order to succeed.  Interestingly enough, our story began with a craigslist add - a third party was purchasing polycarb in bulk and offered the bulk discount to anyone interested.  In a few weeks, we obtained four 16 ft by 6 ft sheets of triple-ply polycarb.

Triple-ply polycarb sheets

Since we knew the dimensions of our boxes, we quickly went to work cutting the sheets down.  This was done easily with a circular saw,   a many toothed blade, and patience. We were now ready to build the cold frames.

The cold frame construction took place in three parts - joists, on site formation, and lids.

The joists were key to the cold frames.  After cutting the polycarb sheets down, we had 16 total lids.  One lid was dedicated to the prototype, so we knew we were going to place 15 cold frames on the fairgrounds.  We also realized that creating a continuous flowing cold frame vs. singular individual cold frames would save materials.  Given these points, we calculated that we'd need 19 joists in total. Once the joists were pieced together, we transported them to the fairgrounds.  Another time saving point worth mentioning, is to have your local lumber company deliver the necessary lumber to your work site!

Prior to delivery of joist and lumber to the fairgrounds, the site itself was greatly modified. Together with fairgrounds staff, we removed approximately 3 feet of existing soil   strata, and replaced it with top soil.  We tested the top soil prior to placement to assure the quality of the soil.  We then leveled our location to the best of our abilities with machinery and rakes.  The last order of business was to mark the exact areas where the cold frames were to be built.  We decided to angle the boxes approximately 30 degrees west of south in order to optimize evening sun capture.  We believed this would be necessary given our potential for extremely cold winter temperatures.

Site prior to construction
With the site prepared and the joists pre-constructed, building the cold frames themselves went pretty darn fast.  We began by placing the joists approximately 6 feet apart and then pieced them together using 12 foot 6 by 2s.  We alternately placed the 6 by 2s to increase overall structure stability.  The end walls were created with vertical placed 6 by 2s cut to match the final joist angle.

Cold frames without lids
At this point, we utilized a six foot level to make the frames as level from end to end and front to back as possible.  We then piled excess soil against the front, back, and sides of the boxes.  The next step to the building process was the lids; however, due to the timing of cold frame construction - late spring - we decided to plant the boxes and lid them at the end of the growing season.  We'll discuss the 2013 growing season and lessons learned in a separate blog post, so stay tuned.

To construct the lids, we utilized stacked 1 by 4s.  By stacking the boards, we were able to create a solid cross member while sustaining a rigid outer frame.  To further rigidity, we included wood glue in addition to screws. Once the
frames were constructed, we were ready
to attach the polycarb, or so we thought.

Recall our desire to include Elliot Coleman's double covering technique.  Well, our first intention was to simply lay shade cloth on top of plants in the evenings so as to decrease radiant heat loss at night.  The theory seemed sound, but we wanted to decrease the amount of times we needed to visit the site each day.  We instead decided to attach shade cloth on the inside of the lid frame while the polycarb would be attached on top or outside of the lid frame.
Lidded cold frames

Inside the lid
To begin the process, we laid the lid frames on top of the cold frames, lined the two up accordingly, and attached hinges. Once the hinges were attached, we were able to open the lid and attach the shade cloth.  We used staples to attach the shade cloth; however, we were concerned that the staples would simply tear right through the cloth, thus we utilized thin wood slats on top of the cloth and then stapled through slat and cloth into the lid frame.  Once the shade cloth had been applied, we were able to close the lids and place the poly carb.  With the lids attached, we were ready to see just how far we could stretch the growing season into a Missoula, Montana winter.  We're hoping to invest in a few logging temperature readers in 2014 to obtain and share temperature data with you - stay tuned!


Saturday, January 11, 2014

One big pile of dirt!

Chris and Heath adding contours to the pile
The Fairground staff has been super helpful along our endeavor to create a concurrent educational and food producing operation. One of the first actions they did for us was to create two large piles of dirt - one we'll discuss later, and the other is the topic of this blog episode.

Our very good friend Steve E. had these piles created for us for two reasons - privacy and vertical growing space.  While both are extremely considerate and forward thinking ideas, we had one problem - water!?  At this moment in time, there exists a leak in the pipelines that carry water to this section of the fairgrounds.  Due to this minor hang up, we decided to explore drought tolerant plant species.

Why plant anything there at all you might ask.  If we consider soil erosion, the causal variables primarily include slope, precipitation, and vegetation.  While we cannot really control climatic events (leaving HAARP and cloud seeding out of the conversation), we can manipulate slope and vegetation.

There are two forms of slope control that immediately come to mind - terracing and contouring. One of the best examples of long lasting terracing in the world is Machu Picchu, in Peru; however, we decided to forgo terracing this mound for the time being, given our water issue.  We'll discuss terracing further in upcoming blogs this spring, though!

One of the issues with erosion we can witness in traditional agriculture is the formation of rills and gullies. In order to prevent these from forming, farmers are advised to plow with the contour.  Permaculture folk have their own alternative to this called a swale and generally will only disturb the soil immediately around the swale versus plowing an entire field along the contour.  In the long run, the idea behind both practices is the same - slow the flow of water, allowing it to penetrate into the soil on site rather than flow off the site all together.  Thus rainwater is captured more effectively and less reliance on irrigation is needed.

Given the small scale of our mound, we decided to emulate a mixture of the two - we'll call it contour shelving.  We started at the top of the mound and spiraled our way back to the bottom, creating a shelf around the mound from top to bottom.  We felt confident that the 14 inches of rain Missoula receives in an average year would flow to the shelves and sink into the mound itself.  Once we walked the shelves in, we readdressed them with rakes, creating a disturbed surface conducive to seeding.

Seeding the mound
The next step in the process was seeding of course!  Given our limited ability to irrigate the mound itself, we decided upon drought tolerant species, including clover, daikon radish, and bunch grasses. This was really the easiest part of the day, as it required simply casting seed throughout the mound. Of course, we took time and care to assure that seed was spread evenly across the shelves, but in many cases, we simply tossed seed at the mound. It was quite liberating!


How did the first season turn out, you ask? Well, if only we would have performed the work about two weeks earlier, we would have caught the last of spring's plentiful rainfall.  As it was, the rainfall after planting was meager at best, dramatically affecting our germination rate.  However, that being said, we did have all three species begin to take hold, albeit sparsely.  Perhaps the greatest observation came at the end of the growing season - many of the radishes that had taken root grew to fruition and actually produced seed.  Overall, while we were unable to outcompete the weeds by dispersing thousands of seed, we were able to gain a foothold on the mound.  Having learned from our procrastinate planting last year, we'll be sure to cast more seed this spring before the rains stop! Stay tuned for man vs. mound, round 2!


Friday, January 10, 2014

Graywater/Aquaponic Innovations

    Current centralized wastewater treatment technologies throughout the US remove roughly 80% of the macronutrients (heavy metals, nitrogen, phosphorus ... etc.) contained in wastewater streams before discharging the 'treated' wastewater into US waterways - streams, rivers, lakes.  One could argue that with greater technology comes greater treatment; however, when considering the energy necessary for current treatment, a more rational argument may point to the amount of wastewater originating from each private residence.  Consider the US EPA estimation of 100 gallons per person per day!

     We began research and development of graywater reuse combined with aquaponics in 2012.  Graywater is defined as wastewater stemming from household sinks, baths, showers, dishwashers, and clothes washers.  Aquaponics refers to a food growing system which utilizes an inhabited fish aquarium for irrigation and fertilization of edible plants.  Our pilot location was a 1920's apartment with twelve foot ceilings.  The concept was to capture wastewater exiting the kitchen sink in a bucket, then hoist the bucket to a high spot where we could slowly drain the bucket into a wetland system and ultimately into the fish tank.  Water from the fish tank, meanwhile, would be pumped up and into a series of grow beds above the tank, slowly draining excess water back into the tank.
The kitchen before system construction

Space within the apartment was extremely limited, thus we began devising a way to utilize vertical space.  With the concept in mind, we installed a 60 gallon fish tank complete with 4 koi.  Fish in aquaponics serve as the "canary in the coal mine" if you will.  If toxins are present in the system, or the pH is off, we will see it first in the health of the fish.  Healthy fish equal a healthy system overall.

Weight bearing ledgers installed
Our first order of business was to fully inspect the proposed area's structural integrity.  After poking around in the ceiling and walls, we were able to confirm that the   building was 'over built' -               structural timber was plentiful       and cheap in 1920s Missoula.  

By placing weight-bearing ledgers perpendicular to wall joists, we would be able to space the weight of the structure across the wall. Once the ledgers were up, it was time to create and install the wetland graywater system.

The wetland graywater system consisted of a series of specialized PVC pipes filled with medium, which would serve as a surface for bacteria and stability for the wetland plants.  Again, unfortunately, I did not think to take photographs as I was building the pipes or, as I like to call them, biofilters.  (The creation of this blog is helping me realize the necessary steps to have more valuable content.)  We utilized three types of biofilters, each having a slight difference in construction, but all having a very similar interior filter design.  By placing a stainless steel insert into the center of a tube, we were able to force the water down one side of the pipe and up the other.  We were able to modify this approach by simply adding a smaller diameter pipe inside the tube, forcing the water to travel down the inside pipe and then back up in the area between the two pipes.  In my opinion, this was the best filter model, as it requires little effort to build and lessens the chance for leakage.  Another model featured a smaller diameter pipe with a U shape; however, this filter proved to be the most troublesome of the bunch -  I'm not sure if it was the diameter difference or just an inappropriate attempt, but several times the pipe leaked.  If I were to set this system up again, I would certainly not include it.  Into each filter we fitted two outlets - a bib, or valve, near the bottom for draining and water sampling; and a barb adapter near the top for overflow.

Biofilters attached to the ledgers
Drain bucket, plants, and lights installed
We knew that we wanted aerobic bacteria so as to the limit unpleasant smells associated with anaerobic decomposition.  For this reason, we placed a large plastic wiffle ball in the bottom of each biofilter.  Inside each wiffle ball, we placed a bubbler and extended an air hose up and out of the biofilter.  While holding this air hose taunt, we filled the biofilter with large rocks, then more porous lava rock, followed by pea gravel. Finally, we planted wild harvested wetland plants in the pea gravel at the top of the tubes.  Once the filters were installed, they were filled with water from the aquarium in order to introduce beneficial bacteria and to feed the wetland plants.  We also added T5 grow lights above the filters to supplement lighting for the plants.

With the filters in place, we added a three-way valve under the sink that allowed us to divert water to a bucket or the sewer. Once the bucket was filled or, once a day, it was moved to the top of the system and allowed to drain into the first filter.   As the wastewater left the bucket, the incoming water displaced biofiltered water up and out of the first tube and into the next by way of the overflow adapter.  This water then displaces water in the next tube and so on until the bucket drains and additional overflow from the final filter enters the fish tank.

Unfortunately, or fortunately, depending on how you look at it, I was beckoned to a new location and the project halted after about 2 months.  We never installed the planter shelves that would support edible plants watered from the fish tank, as I made the decision to move into another house that was attached to a wonderful yard (and thus the food forest was born ... but more on that later). However, I wanted to share this experience with anyone interested as it was a successful means to treat household wastewater and we certainly would have been able to grow food, while decreasing the volume of wastewater leaving the house.  We'll pick this project back up again at some point, whether it be another in-home system or a larger greenhouse demonstration project.  Stay tuned!


Friday, January 3, 2014

The Garlic Patch - no till gardening


Have you ever looked at a patch of weeds and thought, "I'm going to turn this into a garden?" This was the situation we faced when we first rented our community garden.  A local Missoula nonprofit, Garden City Harvest, rents out 15ft by 15ft garden plots at various locations throughout our community.  Garden plots run about $55/year and returning gardeners are given the first opportunity to re-rent their plot.  This is a key factor, for the primary reason, that conscientious farmers improve their soils from one year to the next, adding value and nutrients each consecutive growing season. That being said, our plot was fairly weed ridden when it came into our hands. Some may see this as a curse, but we saw it as a blessing as it meant our plot had laid fallow for at least a season.  By laying fallow with a cover crop of weeds, the soil organic content, and soil structure of our plot was had likely become higher than plots which are tilled twice per year every     year.

          Our first order of business was to remove the unwanted plants. The disciplines of permaculture (Mollison/Lawton/Holmgren/Holzer), natural farming (Fukuoka), and also basic soil texbooks suggest that tilling or plowing a field damages the availability of soil nutrients and soil structure.  When we stir up the soil, we increase the amount of oxygen, which in turn increases microbial activity.  This increased microbial activity and the physical breakup of soil aggregates during tilling leads to the break down of organic matter, which is essential to the water holding and nutrient holding capacity of the soil.  Once the organic matter is gone, microbial activity decreases and microbes begin to die, surrendering their bodily nutrients to the soil strata.  When plants are present, these nutrients can be utilized; however, when plants are not present, many nutrients will wash down and out of the soil strata.  Consider this - by increasing soil organic matter by 1%, we increase soil water holding capacity by 3.7%!

          Bearing this in mind, we utilized soil forks to remove unwanted grasses and weeds, taking care to disrupt the soil as little as possible.  Our main goal at this stage was to remove roots that would continue to grow - i.e., quackgrass rhizome growth.  Once the unwanted plants were removed, we added 2 bags (6 cubic feet) of Happy Frog soil conditioner and rough raked the whole plot.  We then mixed sand and approximately 2000 seeds of various edible species together to help evenly hand-sow our plot.  We chose this planting method in an attempt to out compete and weeds.


Our plot after 9 days
Our plot after ~ 39 days
In what seemed like no time at all, we had a raging garden of edibles. Sunchokes sprang from the ground and reached toward the sky as kale, radish, and mustard took the middle ground.

By late July, our garden was an oasis of green between gardens with neatly rowed crops and paths.  When we visited the plot, we saw little to no weeds.  We noticed weeds encroaching on the sides of the gardens, but very few within the garden itself.  In fact, the few weeds we did see inside the garden were spindly at best, desperately trying to gain hold amongst the edibles.  We made another discovery during this time - the ground was always moist and never dry, even during the hottest of summer days.  Granted, we were fortunate enough to have rented an irrigated plot, but this ran only once per week.  Turns out, having a crowded garden allows for greater soil coverage by plants, thus decreasing the amount of evaporation of soil water to the atmosphere!

 It was fantastic to visit the garden at this point - there was never much 'work' to do, rather, we admired the now flowering edibles, the insects they drew, and of course, the endless bounty of harvest!  During one visit, we harvested about 2/3 of the garden - flowers, tender seed pods, and stems, which in turn became 10 gallons of delicious green kim chi.  The yellow, white, and purple flowers added great aesthetics to the batch!

Our plot after ~ 140 days
By removing 2/3 of the plant matter from the garden, we allowed plants that were struggling with competition to fill in.  While we worried that this would allow for weed growth, we were pleasantly surprised to see tall, lanky kale begin to fill out and take over.  By the end of the growing season, we had about 1/3 of the plot in seed and the rest in purple leaf kale!

Seed harvest with Lia and J.B.
After a successful season, it was time to close the plot for winter. Sunchokes were dug up - some for eating, some for replanting elsewhere - and about 1/2 of the remaining seed stock was harvested.  Harvested seed stock was removed from the stem in complete pods and stored in brown paper bags over winter in a cool dark space.

Next, we employed a weed wacker to make light work of the above ground biomass.  This was raked to the side so that we could assess the plot and prepare for our next planting.


Thus began our garlic patch.  At this point, we made straight rows by pounding a stake into the ground, attaching string and then stretching it straight and securing it to another pounded post.  We were then able to dig a small trench for the garlic. Rows
Removing above ground biomass, while leaving root structure intact
were spaced roughly 12 inches apart and garlic cloves were spaced about 6 inches apart.  The cloves were placed about an inch under the soil surface and the trench filled back in.  Once the garlic was planted, we pulled the removed biomass back onto the plot and spread it around.  We then spread one bale of straw over the entire plot and whalla, the garden was prepared for the winter!

Now I wish we could show you pictures from the following growing season, but alas, no one in our group thought of taking any!?!
Making rows and planting garlic
What I can tell you is this - we visited the plot only a handful of times.  In our visits, we noticed that nearly all of the garlic had sprouted and in the rows between, seeds left over from the successful kale, mustard, and radishes had sprouted. We were again able to out compete the weeds with edibles, even though we used no herbicides and we planted no new seed.  At the end of the season, we counted 480 heads of garlic harvested from our little 15 ft by 15 ft plot!

We closed the plot this past growing season in a way quite
Closed for winter
similar to that noted above, albeit, this season we filled the garlic trenches back up with compost, then raked the soil, then added the biomass and straw.  I'll be sure to add pictures from 2014!

Side note - we will put a crop other than garlic in for 2015, as it is suggested that Alliums should only be planted in the same place for two consecutive years before rotation.  More on that later though!  Happy planting!!!